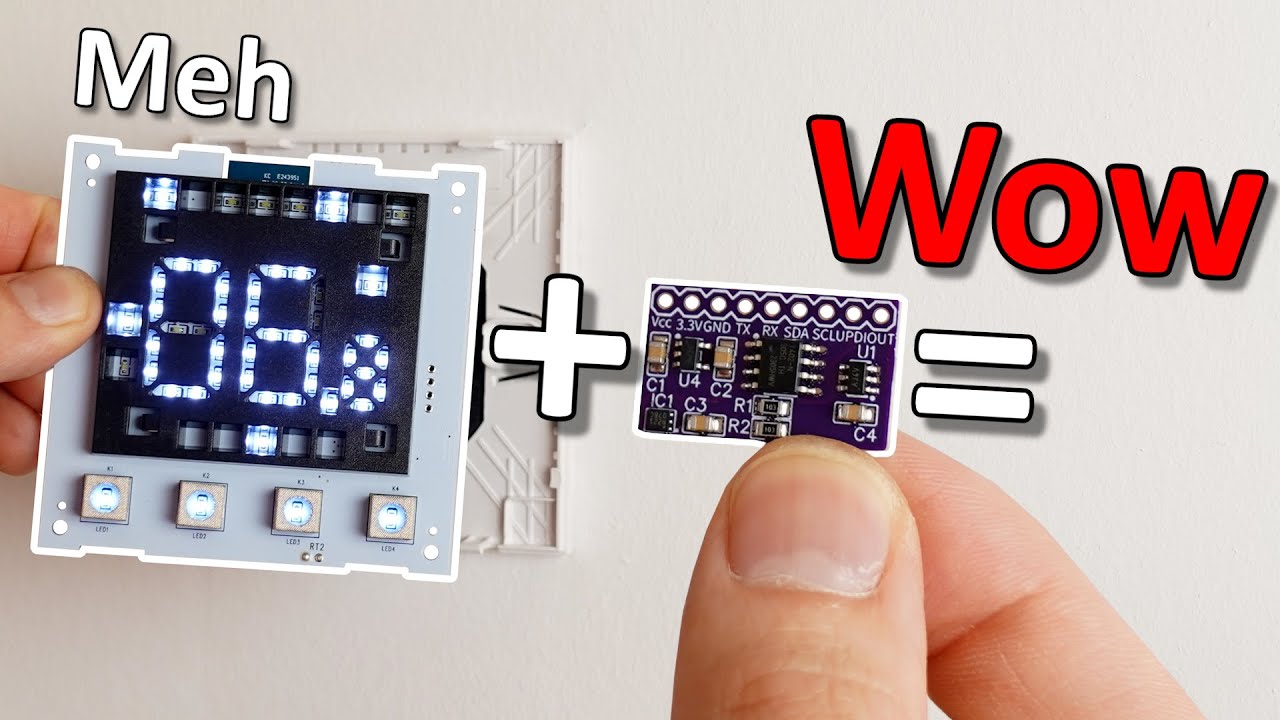
From Meh to WOW - With 1 Tiny Hack!
video description
Date: 2025-11-01
Related videos






Comments and reviews: 20
chrispac6264
All my life in HVAC. I noticed that the gap inside the wall was not both isolated and insulated from the inside of your thermostat.
It looks like you had a very big hole in the wall as well.
Even if there is only a tiny little hole big enough to bring the wire up into the back of the thermostat it’s still a smart play to seal that little hole (at the least with a piece of adhesive tape) to keep the unconditioned air out of the wall from travelling out of the wall cavity via the inside of the thermostat and then over your thermostat sensor bulb, stopping your thermostat registering the room temperature. In some cases that internal wall space can be slightly pressurised due to the wall cavity opening above or below the conditioned space or even outside the building, making the problem worse. At the very least I would seal the gap around the sensor bulb and the housing so that inside the wall Air is not able to exfil the wall via any path related to the sensor bulb.
reply
All my life in HVAC. I noticed that the gap inside the wall was not both isolated and insulated from the inside of your thermostat.
It looks like you had a very big hole in the wall as well.
Even if there is only a tiny little hole big enough to bring the wire up into the back of the thermostat it’s still a smart play to seal that little hole (at the least with a piece of adhesive tape) to keep the unconditioned air out of the wall from travelling out of the wall cavity via the inside of the thermostat and then over your thermostat sensor bulb, stopping your thermostat registering the room temperature. In some cases that internal wall space can be slightly pressurised due to the wall cavity opening above or below the conditioned space or even outside the building, making the problem worse. At the very least I would seal the gap around the sensor bulb and the housing so that inside the wall Air is not able to exfil the wall via any path related to the sensor bulb.
reply
MarioStoilov-q2e
My solution at home is:
1. Do NOT use the integrated temperature sensors in the thermostat or AC. Even if they are accurate, they measure right in front of them which is usually NOT representative to the actual room temperature.
2. Get some Zigbee/Zwave/Wifi (whichever suits you) temperature sensors.
3. Place 2 or three sensors at strategic spots in the relevant room
4. Using home assistant automation and scripts, get the average temperature from the sensors and use that in your automation/dashboards.
4. 1 This way you can skip the thermostat, since it's functionality is covered by software and the sensors. You can use a random display if you want the wall mounted experience. If you still want to use your thermostat, look for an api to overwrite it's display temperature.
reply
My solution at home is:
1. Do NOT use the integrated temperature sensors in the thermostat or AC. Even if they are accurate, they measure right in front of them which is usually NOT representative to the actual room temperature.
2. Get some Zigbee/Zwave/Wifi (whichever suits you) temperature sensors.
3. Place 2 or three sensors at strategic spots in the relevant room
4. Using home assistant automation and scripts, get the average temperature from the sensors and use that in your automation/dashboards.
4. 1 This way you can skip the thermostat, since it's functionality is covered by software and the sensors. You can use a random display if you want the wall mounted experience. If you still want to use your thermostat, look for an api to overwrite it's display temperature.
reply
jonanon8193
This has SOOOO much more potential.
You often see on weather forecasts something like a Realfeel temperature which is supposed to be the temperature it feels because of the temperature humidity effect.
You could program your little microcontroller to input both temperature and humidity and output a Realfeel equivalent temperature.
This might fix the problem I have had with ACs that under a specific set of environmental conditions it's too hot, but lower the set point 1 degree and it becomes too cold. I think this might be from the AC not just cooling but also dehumidifying so under some circumstances it is overdoing the RealFeel cooling and always too hot or cold.
reply
This has SOOOO much more potential.
You often see on weather forecasts something like a Realfeel temperature which is supposed to be the temperature it feels because of the temperature humidity effect.
You could program your little microcontroller to input both temperature and humidity and output a Realfeel equivalent temperature.
This might fix the problem I have had with ACs that under a specific set of environmental conditions it's too hot, but lower the set point 1 degree and it becomes too cold. I think this might be from the AC not just cooling but also dehumidifying so under some circumstances it is overdoing the RealFeel cooling and always too hot or cold.
reply
VeniceInventors
Even if it's not perfect it's a lot better than it was before and you learned something in the process.
You could put your thermal imaging camera to good use to find which component is producing the most heat (my bet is on the voltage regulator) and add a thick copper wire to its ground pin to pull as much heat away from it, maybe dumping it somewhere cooler into the white PCB. At first I thought about the ground pad of U2 but if it runs hotter it would add heat instead of absorb it.
Anyway it's a cool example of how to interface otherwise-incompatible circuits.
reply
Even if it's not perfect it's a lot better than it was before and you learned something in the process.
You could put your thermal imaging camera to good use to find which component is producing the most heat (my bet is on the voltage regulator) and add a thick copper wire to its ground pin to pull as much heat away from it, maybe dumping it somewhere cooler into the white PCB. At first I thought about the ground pad of U2 but if it runs hotter it would add heat instead of absorb it.
Anyway it's a cool example of how to interface otherwise-incompatible circuits.
reply
giomac
WBR3. Have three of these thermostats lying here. Replacing WBR3 is not the problem, problem is that it still has to communicate with the Tuya chip and its still a mystery how it exposes things. So, having esphome around wont solve the issues.
In my case I was unable to flash WBR3 either, so, replaced it with esp32c3. As said before, problems are still there, so, finally, decides to get rid of those and get something that works well with non-proprietary, non-cloud ecosystem and is also able to recognize external NTC for safety switch (underfloor carbon heating overheating)
reply
WBR3. Have three of these thermostats lying here. Replacing WBR3 is not the problem, problem is that it still has to communicate with the Tuya chip and its still a mystery how it exposes things. So, having esphome around wont solve the issues.
In my case I was unable to flash WBR3 either, so, replaced it with esp32c3. As said before, problems are still there, so, finally, decides to get rid of those and get something that works well with non-proprietary, non-cloud ecosystem and is also able to recognize external NTC for safety switch (underfloor carbon heating overheating)
reply
Danny323f
I think the TUYA WBR3 is supported to flash with openbeken.
Maybe then you could write software for it with a calibration function. to compensate for the ntc
in the netherland action sells the LSC branded iot stuff first with the esp compatible chips that could be flashed with tasmota later with the incompatible beken chips.
i was thinkering around with them when i found other people also started with the same idea and found the openbeken project in early stage.
i flashed some items like led stipe and floodlight with it.
nice mod solution by the way: )
reply
I think the TUYA WBR3 is supported to flash with openbeken.
Maybe then you could write software for it with a calibration function. to compensate for the ntc
in the netherland action sells the LSC branded iot stuff first with the esp compatible chips that could be flashed with tasmota later with the incompatible beken chips.
i was thinkering around with them when i found other people also started with the same idea and found the openbeken project in early stage.
i flashed some items like led stipe and floodlight with it.
nice mod solution by the way: )
reply
Rob_65
A DS18B20 might have been the better choice for the temperature sensor. It has almost the same accuracy as the Wurth sensor (/- 0. 5 deg max) and almost the same temperature range. Although. I don't think that going down to -80 or up to 125 is a situation where you expect the thermostat to still work accurately
As a plus, the 18B20 comes in a thru hole variant so it can be mounted free in mid air below the PCB instead of on the PCB where it will take longer time to reach the actual room temperature.
Still a fun exercise though and an enjoyment to watch
reply
A DS18B20 might have been the better choice for the temperature sensor. It has almost the same accuracy as the Wurth sensor (/- 0. 5 deg max) and almost the same temperature range. Although. I don't think that going down to -80 or up to 125 is a situation where you expect the thermostat to still work accurately
As a plus, the 18B20 comes in a thru hole variant so it can be mounted free in mid air below the PCB instead of on the PCB where it will take longer time to reach the actual room temperature.
Still a fun exercise though and an enjoyment to watch
reply
Viking8888
I understand the concepts behind doing these hacks, but I wish I had the electronics and programming knowledge to make the hacks come to life. I find it so fascinating, but so confusing at the same time. I just recently bought my first ESP32 to make a gadget that will give me physical control over some of my smart lights that my wife and I have to use Alexa to turn on and off. I'm copying one of Colton's projects from Hardware Haven. I figure that's a good starting project to help me learn and possibly expand it over time.
reply
I understand the concepts behind doing these hacks, but I wish I had the electronics and programming knowledge to make the hacks come to life. I find it so fascinating, but so confusing at the same time. I just recently bought my first ESP32 to make a gadget that will give me physical control over some of my smart lights that my wife and I have to use Alexa to turn on and off. I'm copying one of Colton's projects from Hardware Haven. I figure that's a good starting project to help me learn and possibly expand it over time.
reply
darknessblades
You do know that all these panels have a option to tune the OFFSET right
Also: why not swap it out for a ZIGBEE based one those are much better than Wifi based models, and much easier to add to Homeassistant.
And you can tune the offset straight in HASS without much issues
Thee reason you have issues with the temperature is because you bought the NONAME brand, Just stick to more trusted brands like AVATTO.
I would suggest to avoid MOES. because those have a Set-temp=X issue where it spikes for 1ms
reply
You do know that all these panels have a option to tune the OFFSET right
Also: why not swap it out for a ZIGBEE based one those are much better than Wifi based models, and much easier to add to Homeassistant.
And you can tune the offset straight in HASS without much issues
Thee reason you have issues with the temperature is because you bought the NONAME brand, Just stick to more trusted brands like AVATTO.
I would suggest to avoid MOES. because those have a Set-temp=X issue where it spikes for 1ms
reply
TheAleksanderB
I think I have a nearly identical thermostat setup for my home automation with an electric boiler. Have you checked the manual for a way to set the temperature offset Nearly all devices provided by Tuya come with such functionality. Even this thermostat, but they are coded and documented in the manual. For example, mine requires to press the 4 squares, up and down button at the same time to enter the settings menu. Then I need to select code 7 or 8 and from there set the offset in steps of 0. 1
reply
I think I have a nearly identical thermostat setup for my home automation with an electric boiler. Have you checked the manual for a way to set the temperature offset Nearly all devices provided by Tuya come with such functionality. Even this thermostat, but they are coded and documented in the manual. For example, mine requires to press the 4 squares, up and down button at the same time to enter the settings menu. Then I need to select code 7 or 8 and from there set the offset in steps of 0. 1
reply
sidddpatty
Hey great scott, i was creating that directional speaker from your video, altho there were far more changes in mine, i have many doubts, could u help, i am using the esp32 for microcontroller, instead of bluetooth module, using esp as the bluetooth using the pschaltzman audiosink lib, then instead of waveform generator and comparator, both these operations are done using the code in arduino in esp32, for amplfier driver board i am using drv8871 board, will this work u can ask anything if u wish
reply
Hey great scott, i was creating that directional speaker from your video, altho there were far more changes in mine, i have many doubts, could u help, i am using the esp32 for microcontroller, instead of bluetooth module, using esp as the bluetooth using the pschaltzman audiosink lib, then instead of waveform generator and comparator, both these operations are done using the code in arduino in esp32, for amplfier driver board i am using drv8871 board, will this work u can ask anything if u wish
reply
greatscott
I started with an esp32 with a temperature sensor (bme280, i think. I added a relay and connected it to the furnace (in parallel to an old school mercury switch, some impedance matching. I used the normally open part of the relay so the default is OFF.
I wifi enabled the esp32 to show the temp and added a webpage button to activate heating. I set ut up to increase the house temp by 4 degrees, running up to an hour. This way i can heat the house by vpn and activating that remotely.
reply
I started with an esp32 with a temperature sensor (bme280, i think. I added a relay and connected it to the furnace (in parallel to an old school mercury switch, some impedance matching. I used the normally open part of the relay so the default is OFF.
I wifi enabled the esp32 to show the temp and added a webpage button to activate heating. I set ut up to increase the house temp by 4 degrees, running up to an hour. This way i can heat the house by vpn and activating that remotely.
reply
bbbill42
God I love the esp32, I was thrilled when the esp32c came out with riscv cores, but the idf actually means I can use the same code on riscv and their (either arc or tensilica) cores so the 32s are fine too.
This does seem like a long way around, but it makes sense given the application, might just want to replace their stack though, you can get a color lcd module and just wire the back into the relay and I figure either tuya or even just GitHub has a stack to interface with hass.
reply
God I love the esp32, I was thrilled when the esp32c came out with riscv cores, but the idf actually means I can use the same code on riscv and their (either arc or tensilica) cores so the 32s are fine too.
This does seem like a long way around, but it makes sense given the application, might just want to replace their stack though, you can get a color lcd module and just wire the back into the relay and I figure either tuya or even just GitHub has a stack to interface with hass.
reply
HolyDreamer
00: 55 That's why my smart home thermostatic valves operate based on data from external smart temperature sensors. The valve in each room operates according to the external smart thermostat value in that room. If a valve in a room activates, the boiler starts operating. Regardless of the temperature on the boiler or valve, they apply the rules based on the data from the external sensor. This way, I achieve more stable room temperatures and optimal gas consumption.
reply
00: 55 That's why my smart home thermostatic valves operate based on data from external smart temperature sensors. The valve in each room operates according to the external smart thermostat value in that room. If a valve in a room activates, the boiler starts operating. Regardless of the temperature on the boiler or valve, they apply the rules based on the data from the external sensor. This way, I achieve more stable room temperatures and optimal gas consumption.
reply
georgemiller2129
Boring My dude, you have underfloor heating That's awesome! Do you ever sit on the floor on cold days and just enjoy the warmth Like, how awesome is it to get out of the shower and step onto nice warm floor
For context: I have forced air in my house, which is pretty common in Michigan where I live. It is a good system, but it can be slow to respond to changes, and the blown air does create currents and drafts in the home.
reply
Boring My dude, you have underfloor heating That's awesome! Do you ever sit on the floor on cold days and just enjoy the warmth Like, how awesome is it to get out of the shower and step onto nice warm floor
For context: I have forced air in my house, which is pretty common in Michigan where I live. It is a good system, but it can be slow to respond to changes, and the blown air does create currents and drafts in the home.
reply
DanielsGameVault
Don't the thermostats have some sort of built-in offset you can tweak My gas boiler does - it allows you to compensate for any inaccuracies in the outdoor temperature reading caused by the length of wire between it and the actual outdoor probe (which is nothing more than a 10k NTC like yours stuck inside a small box, which is always going to vary greatly for each particular installation of said boiler.
reply
Don't the thermostats have some sort of built-in offset you can tweak My gas boiler does - it allows you to compensate for any inaccuracies in the outdoor temperature reading caused by the length of wire between it and the actual outdoor probe (which is nothing more than a 10k NTC like yours stuck inside a small box, which is always going to vary greatly for each particular installation of said boiler.
reply
SaltyPuglord
LM35 (or LMT70 if you're really picky. Direct analog voltage output.
A simple resistive voltage divider to scale that analog output voltage to what the thermostat expects. (Pads for the resistors are already on the thermostat's PCB)
This project is an impressive flex of your design knowledge and fabrication skill. I don't doubt you on either of those. But there was no need for such insane acrobatics.
reply
LM35 (or LMT70 if you're really picky. Direct analog voltage output.
A simple resistive voltage divider to scale that analog output voltage to what the thermostat expects. (Pads for the resistors are already on the thermostat's PCB)
This project is an impressive flex of your design knowledge and fabrication skill. I don't doubt you on either of those. But there was no need for such insane acrobatics.
reply
ParswaNathTheo
I managed to get very accurate temperature reading with a TMP117 sensor. We measured it's accuracy with laboratory grade thermometer and it achieved - 0. 25 deg C accuracy in our tests, close to - 0. 1 deg C as advertised. We employed this to measure/control temperature of a heatbed to perform thermal cycling for PCR (polymerase chain reaction) with very high accuracy.
reply
I managed to get very accurate temperature reading with a TMP117 sensor. We measured it's accuracy with laboratory grade thermometer and it achieved - 0. 25 deg C accuracy in our tests, close to - 0. 1 deg C as advertised. We employed this to measure/control temperature of a heatbed to perform thermal cycling for PCR (polymerase chain reaction) with very high accuracy.
reply
lanefowler150
A Control for Heating and HVAC has a bit more logic, that turn on at some tempture.
You have to keep the HVAC unit on for a certain number of minutes and prevent cycling.
Example if its 21C and you want it at 22C you need to turn on for a few mins, if you just cycle
on at 21C and off at 22C this could damage system just for 1 degree tempture change.
reply
A Control for Heating and HVAC has a bit more logic, that turn on at some tempture.
You have to keep the HVAC unit on for a certain number of minutes and prevent cycling.
Example if its 21C and you want it at 22C you need to turn on for a few mins, if you just cycle
on at 21C and off at 22C this could damage system just for 1 degree tempture change.
reply
-Evilempire-
I came across a CYD with a square display and a mount for German wall boxes on Aliexpress the other day. They cost less than 20 and are an excellent replacement for thermostats. All they lack is the temperature chip. They can play audio and manage not only the thermostat via rear contacts, but also other outputs and all home automation via ESP Home.
reply
I came across a CYD with a square display and a mount for German wall boxes on Aliexpress the other day. They cost less than 20 and are an excellent replacement for thermostats. All they lack is the temperature chip. They can play audio and manage not only the thermostat via rear contacts, but also other outputs and all home automation via ESP Home.
reply
Add a review, comment
Other channel videos