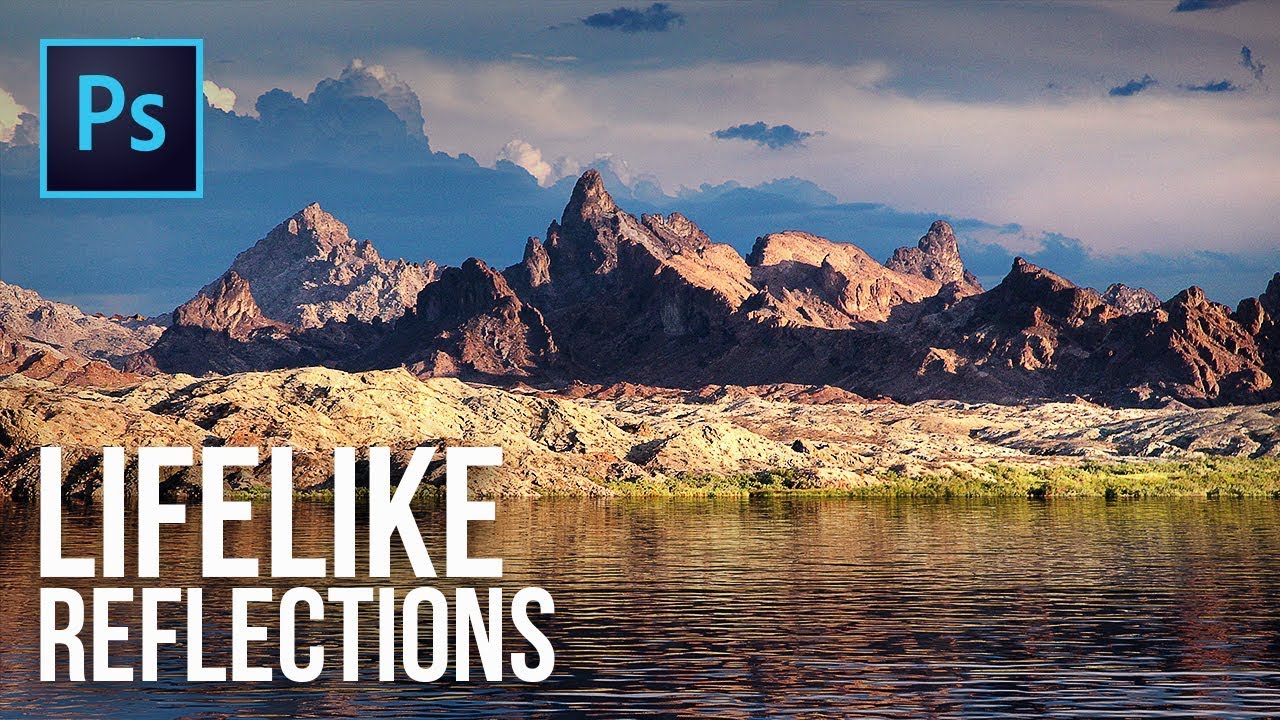
Create Lifelike Water Reflections in Photoshop Using the Power of 3D
video description
Date: 2022-07-19
Related videos


Comments and reviews: 20
Peter
Photoshop 2020, released in November 2019 switched up the 3D materials to Physically-Based Rendering (PBR, but just assumed everyone would know how to use it because they didn't provide any documentation! Here's how to adapt:
Follow the tutorial and pause the video at 12: 10.
Once you've clicked on Mountain in the 3D panel to display the material properties, just right-click on the Environment folder, then choose Mountain from the drop-down.
Next, click on the Water material. Instead of adjusting any sliders, click on the graphical sphere in the upper right corner, and choose Metal Chrome (it'll look like a distorted checkerboard. That will apply all the reflective materials.
Resume video at 14: 23 and follow the instructions with ONE EXCEPTION. Right-click the Height folder instead of the Bump folder (which is now gone)
I was able to replicate the exact same effect with these changes.
reply
Photoshop 2020, released in November 2019 switched up the 3D materials to Physically-Based Rendering (PBR, but just assumed everyone would know how to use it because they didn't provide any documentation! Here's how to adapt:
Follow the tutorial and pause the video at 12: 10.
Once you've clicked on Mountain in the 3D panel to display the material properties, just right-click on the Environment folder, then choose Mountain from the drop-down.
Next, click on the Water material. Instead of adjusting any sliders, click on the graphical sphere in the upper right corner, and choose Metal Chrome (it'll look like a distorted checkerboard. That will apply all the reflective materials.
Resume video at 14: 23 and follow the instructions with ONE EXCEPTION. Right-click the Height folder instead of the Bump folder (which is now gone)
I was able to replicate the exact same effect with these changes.
reply
JB
Hi, I opine all: The landscape part is not upright, as an upright postcard may be; with a landscape, if the mountains are further back and the bank area ie next to the water unless a vertically raised bank, also slopes backwards, the reflection of the mountain will be less in the reflection; usually reflection such as in the final image suggests whatever is reflecting is high and next to the edge. For example, a tree at the edge might reflect any exposed roots, but these would not show if the tree was further. If the distance between the water's edge and the tree is subtracted from the height of the tree, then that will be a rough guide to how much will reflect. I hope these opined comments are useful.
reply
Hi, I opine all: The landscape part is not upright, as an upright postcard may be; with a landscape, if the mountains are further back and the bank area ie next to the water unless a vertically raised bank, also slopes backwards, the reflection of the mountain will be less in the reflection; usually reflection such as in the final image suggests whatever is reflecting is high and next to the edge. For example, a tree at the edge might reflect any exposed roots, but these would not show if the tree was further. If the distance between the water's edge and the tree is subtracted from the height of the tree, then that will be a rough guide to how much will reflect. I hope these opined comments are useful.
reply
Micky
Thank you - that was terrific, your tutorials are good - but this was outstanding.
Especially as it was using functions I have never even looked at!
I will need to work through this a few times though to properly understand.
Quick tip or anyone practising this,
I greatly reduced the size of the image, so when rendering it only took a few of minutes.
(i had to download an different image of my own as yours downloaded as a. webp and photoshop didn't want to open it)
reply
Thank you - that was terrific, your tutorials are good - but this was outstanding.
Especially as it was using functions I have never even looked at!
I will need to work through this a few times though to properly understand.
Quick tip or anyone practising this,
I greatly reduced the size of the image, so when rendering it only took a few of minutes.
(i had to download an different image of my own as yours downloaded as a. webp and photoshop didn't want to open it)
reply
Richard
Unmesh, this technique is the most natural that I have seen. I have a problem with this method. I select the two layers and click 3D but I do not have the same choices as what you see. I use PS CC latest version. I tried the 3D workspace, the Photographer's workspace, the Graphics Processor checked in Preferences, tried 8 bit vs 16 bit but the New Mesh from Layers is greyed out. Any suggestions?
reply
Unmesh, this technique is the most natural that I have seen. I have a problem with this method. I select the two layers and click 3D but I do not have the same choices as what you see. I use PS CC latest version. I tried the 3D workspace, the Photographer's workspace, the Graphics Processor checked in Preferences, tried 8 bit vs 16 bit but the New Mesh from Layers is greyed out. Any suggestions?
reply
Byomaprakash
hey unmesh. i have downloaded all your tutorials. Your way of talking is much interesting. The skin retouching action tool which you have uploaded is very useful. One request to you, please make a video on manipulation, at least one because am so weak in this case. I hope, you will respond.
reply
hey unmesh. i have downloaded all your tutorials. Your way of talking is much interesting. The skin retouching action tool which you have uploaded is very useful. One request to you, please make a video on manipulation, at least one because am so weak in this case. I hope, you will respond.
reply
cacophonix
Hi Unmesh - the 3D panel in PS 2020 is different (does not have shine and reflection sliders for example. Can you add a section to the video for PS 2020? I tried to follow your instructions but could not get the same result. Thanks,
reply
Hi Unmesh - the 3D panel in PS 2020 is different (does not have shine and reflection sliders for example. Can you add a section to the video for PS 2020? I tried to follow your instructions but could not get the same result. Thanks,
reply
50
I dont get it. I thought increasing the UV to 200% took care of the light leaks from the sides, but when he re-rendered it did nothing and then he ended up just cropping the image. so what was the point of the UV edit?
reply
I dont get it. I thought increasing the UV to 200% took care of the light leaks from the sides, but when he re-rendered it did nothing and then he ended up just cropping the image. so what was the point of the UV edit?
reply
mjsliberiangirl
Wow so much Information. A Great tutorial!
Hope you produce more 3 d tutorials. (Good) 3d PS tutorials are soo rare. I would love to master that section one day with your help: )
reply
Wow so much Information. A Great tutorial!
Hope you produce more 3 d tutorials. (Good) 3d PS tutorials are soo rare. I would love to master that section one day with your help: )
reply
Nanookh54
Wow, pretty impressive and extensive tutorial. Thanks for sharing! Full rendering took about 40 minutes on my PC. I'll try this one again on the Mac and see how long it takes then: -)
reply
Wow, pretty impressive and extensive tutorial. Thanks for sharing! Full rendering took about 40 minutes on my PC. I'll try this one again on the Mac and see how long it takes then: -)
reply
Gary
Great Video! Even though this is above my abilities in Ps, I still learn a lot from you going thru the process. Your detailed instructions, narrative, description, etc help so much. Thanks
reply
Great Video! Even though this is above my abilities in Ps, I still learn a lot from you going thru the process. Your detailed instructions, narrative, description, etc help so much. Thanks
reply
Upendra
Amazing Tutorial! Got a little too tough to just watch and remember bits, probably that's why a little lower number of views as compare to other videos. Still, great one!
reply
Amazing Tutorial! Got a little too tough to just watch and remember bits, probably that's why a little lower number of views as compare to other videos. Still, great one!
reply
Dwargh
I have noticed that if you convert the canvas into a smart object prior to applying the fibres, the fibres won't rotate back with the image. They stay in a vertical order.
reply
I have noticed that if you convert the canvas into a smart object prior to applying the fibres, the fibres won't rotate back with the image. They stay in a vertical order.
reply
Johnnie
What are the advantages of using this method as opposed to just selecting, transforming, flipping and adding motion blur etc? Are the end results not pretty much similar?
reply
What are the advantages of using this method as opposed to just selecting, transforming, flipping and adding motion blur etc? Are the end results not pretty much similar?
reply
Mary
This is really awesome and your explanations are so great! It makes me understand so much more and being able to try next to following your video. Thank you so much.
reply
This is really awesome and your explanations are so great! It makes me understand so much more and being able to try next to following your video. Thank you so much.
reply
Andrew
I recently started teaching myself Ps principles and I have to say, every tutorial I learn an incredible amount. Thank you for putting in the time to make these!
reply
I recently started teaching myself Ps principles and I have to say, every tutorial I learn an incredible amount. Thank you for putting in the time to make these!
reply
Aichauer
You are so great! I am a Photoshop-Trainer for more than 20 years and i realy learn soooooo much from you and your tutorials. All thumps up!
reply
You are so great! I am a Photoshop-Trainer for more than 20 years and i realy learn soooooo much from you and your tutorials. All thumps up!
reply
Ferdally
The most challenging tuto, until now. After all the frustration (due to technical problems) I was so happy with the result. Thanks a lot! :)
reply
The most challenging tuto, until now. After all the frustration (due to technical problems) I was so happy with the result. Thanks a lot! :)
reply
Photowildsa
When I render the image, the colors in my picture change(almost become over saturated. How can I stop this from happening? Thanks
reply
When I render the image, the colors in my picture change(almost become over saturated. How can I stop this from happening? Thanks
reply
Suma
OMG, that's too much i guess, but yeah i am following and maybe i'll show u the result: ) So Smart. Beyond. keep up the hard work: )
reply
OMG, that's too much i guess, but yeah i am following and maybe i'll show u the result: ) So Smart. Beyond. keep up the hard work: )
reply
MrGoodtimes2011
Awesome as always Sir. Keep up the great work. You're the man. Oh by the way this is one of your fb friends Charles Lowe.
reply
Awesome as always Sir. Keep up the great work. You're the man. Oh by the way this is one of your fb friends Charles Lowe.
reply
Add a review, comment
Other channel videos